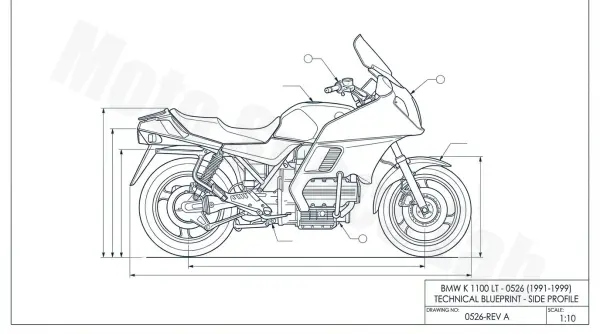
BMW K 1100 LT (1991 – 1999) Maintenance Guide: Keeping the “Flying Brick” Alive
The BMW K 1100 LT (Model 0526), produced between 1991 and 1999, remains one of the most respected touring motorcycles in history. Known affectionately as the “Flying Brick” due to its unique longitudinal inline-four engine layout, the K 1100 LT offers a blend of German engineering, long-distance comfort, and surprising agility. However, to keep this 1092cc powerhouse running smoothly into its third or fourth decade, a rigorous maintenance schedule is non-negotiable.
Whether you are a seasoned mechanic or a new owner of a vintage K-bike, this comprehensive guide covers the essential service tasks required to ensure reliability, safety, and performance.
Table of Contents
- 1. Technical Specifications & Fluids
- 2. Routine Maintenance Schedule
- 3. Engine Oil and Filter Change
- 4. Transmission and Final Drive Service
- 5. Cooling System Maintenance
- 6. Valve Clearance Inspection
- 7. The Critical Spline Lubrication
- 8. Braking System and ABS Care
- 9. Fuel System and Air Filter
- 10. Electrical System and Hall Effect Sensor
1. Technical Specifications & Fluids
Before turning a wrench, ensure you have the correct fluids. The K 1100 LT is robust, but using the wrong specifications can lead to premature wear in the seals or drivetrain.
- Engine Oil: 3.75 Liters (with filter). Recommended: 15W-50 or 20W-50 Mineral or Semi-Synthetic (API SF, SG, or SH).
- Transmission Oil: 0.8 Liters. Gear oil SAE 80W-90 or 75W-140 GL-5.
- Final Drive Oil: 0.26 Liters. Gear oil SAE 80W-90 or 75W-140 GL-5.
- Coolant: 50/50 Distilled Water/Ethylene Glycol (Nitrite-free). Capacity: approx. 3.0 Liters.
- Brake Fluid: DOT 4.
- Spark Plugs: Bosch XR5DC or NGK DR7EA (Gap: 0.6mm – 0.7mm).
2. Routine Maintenance Schedule
| Task | Interval (Miles) | Interval (KM) |
|---|---|---|
| Engine Oil & Filter | 6,000 | 10,000 |
| Transmission & Final Drive Oil | 12,000 | 20,000 |
| Air Filter Replacement | 12,000 | 20,000 |
| Spark Plug Replacement | 12,000 | 20,000 |
| Valve Clearance Check | 18,000 | 30,000 |
| Brake Fluid Flush | Annually | Annually |
| Coolant Flush | Every 2 Years | Every 2 Years |
| Drive Shaft Spline Lube | 24,000 (Recommended) | 40,000 |
3. Engine Oil and Filter Change
The K 1100 LT engine is water-cooled, but oil still plays a massive role in heat dissipation and lubrication of the complex internal components. Because the oil filter is located inside the oil pan, this job requires a specific tool.
Step-by-Step Oil Service:
- Warm the Engine: Ride the bike for 10 minutes to thin the oil for better drainage.
- Remove the Belly Pan: On the LT model, you must remove the lower fairing section to access the drain plug.
- Drain the Oil: Place a pan under the 19mm drain plug located on the bottom of the engine. Remove the plug and let the oil drain completely.
- Access the Filter: Use a 13mm socket to remove the round cover plate on the bottom of the oil pan. Inside, you will see the oil filter.
- Remove the Filter: You will need a 74mm 14-flute oil filter wrench. Standard strap wrenches will not fit inside the recess.
- Install New Filter: Lubricate the rubber gasket of the new filter with fresh oil. Hand-tighten, then turn 1/4 to 1/2 turn with the wrench.
- Seal and Refill: Replace the cover plate (ensure the O-ring is seated) and the drain plug using a new crush washer. Refill with 3.75L of oil and check the sight glass.
4. Transmission and Final Drive Service
Unlike many modern bikes, the K 1100 LT separates its engine oil from its gearbox and final drive. These components require heavy-duty gear oil (GL-5).
Transmission: The fill plug is located on the right side, while the drain is on the bottom. Always ensure you can remove the fill plug before removing the drain plug. Fill until the oil reaches the bottom of the fill hole threads (approx. 800ml).
Final Drive: The drain plug is at the very bottom of the rear drive housing. The fill plug is on top. Like the transmission, fill until the oil is level with the bottom of the fill hole (approx. 260ml). Watch for metallic “fuzz” on the magnetic drain plugs; a small amount is normal, but chunks indicate imminent bearing failure.
5. Cooling System Maintenance
The K 1100 LT is a high-compression engine that generates significant heat. The cooling system must be in top shape to prevent head gasket failure.
- The Flush: Drain the system by removing the lowest hose on the water pump (left side of the engine).
- The Coolant: Use only phosphate-free coolant to protect the aluminum engine components.
- Bleeding: After refilling, you must bleed the air out. Squeeze the radiator hoses while the bike is running (cap off) to burp air bubbles. Failure to do this can cause localized overheating.
6. Valve Clearance Inspection
The K 1100 LT uses a shim-and-bucket system. While these valves are incredibly stable, they must be checked every 18,000 miles. Accessing them requires removing the valve cover on the left side of the bike.
Pro Tip: If the clearances are within spec (Intake: 0.15–0.20mm; Exhaust: 0.25–0.30mm), do not touch them. If they are out of spec, you will need a special BMW tool to depress the buckets and swap the shims without removing the camshafts.
7. The Critical Spline Lubrication
Every 24,000 to 40,000 miles, the rear swingarm should be dropped to grease the drive shaft splines. Additionally, the clutch splines (where the transmission input shaft meets the clutch plate) should be lubricated. Use a high-molybdenum grease like Staburags NBU 30 PTM or Honda Moly 60. This is a labor-intensive job but essential for the longevity of the drivetrain.
8. Braking System and ABS Care
Most K 1100 LTs are equipped with ABS I or ABS II. These systems are sensitive to old fluid. Brake fluid is hygroscopic (absorbs water), which can cause the internal pistons of the ABS modulator to corrode and seize.
- Annual Flush: Flush the front and rear brake lines every year.
- ABS Reset: If your ABS lights are flashing alternately, it usually indicates a low battery voltage during startup or a fault in the system. Always ensure your battery is fully charged before troubleshooting the ABS.
9. Fuel System and Air Filter
The K 1100 LT uses Bosch Motronic fuel injection. It is highly reliable but depends on clean fuel and air.
Fuel Filter:
The fuel filter is located inside the gas tank. To replace it, you must remove the gas cap assembly. It is recommended to change this every 24,000 miles. Check the internal fuel hoses for cracking (submersible fuel hose is required if replacing).
Air Filter:
The air filter is housed in a tray under the fuel tank. You must slide the tank back or remove it to access the filter clips. A clogged air filter will significantly reduce fuel economy and cause the bike to run “rich.”
10. Electrical System and Hall Effect Sensor
The “Flying Brick” is famous for its Bosch electrical system. However, two common issues arise with age:
- The Hall Effect Sensor (HES): Located behind the front engine cover, this sensor tells the computer when to fire the spark plugs. The wiring insulation often degrades due to heat. If your bike dies suddenly when hot but starts when cold, the HES is the likely culprit.
- Ground Points: The main ground is located under the fuel tank on the frame. Ensure this is clean and tight to prevent mysterious starting issues.
- Battery: These bikes require a lot of cranking amps. A weak battery will not only fail to start the bike but will also trigger ABS faults.
Summary Checklist for Owners
- Check oil level via the sight glass before every long ride.
- Keep the battery on a tender if the bike sits for more than a week.
- Listen for “clunking” in the drivetrain; this may indicate worn rubber dampers in the output shaft.
- Inspect the “weep hole” under the front of the engine. If oil or coolant is leaking, your oil/water pump seals need replacement.
Conclusion
The BMW K 1100 LT – 0526 is a masterpiece of 1990s touring technology. While it requires more specialized maintenance than a modern Japanese bike, the rewards are a unique riding character and a machine capable of exceeding 200,000 miles. By following this guide and staying on top of your fluids and spline lubrication, your “Flying Brick” will remain a reliable companion for the open road.
Disclaimer: This guide is for informational purposes only. Always consult the official BMW factory service manual for torque specifications and safety procedures.